
Proxying with Charles is an easy way to monitor and manipulate network traffic as needed for testing. It’s also a great way to visualize the inner workings of an interface, and can be helpful for debugging issues. Setting it up is typically really simple, and doesn’t require extra tooling, but that isn’t the case for tvOS devices.
Charles is a much-loved tool here at WillowTree. Our blog actually already has an article about Charles Proxy and Apple TVs. However, the process has gotten a little more complicated with the removal of the USB-C port on the 4K Apple TV’s, so I’d like to expand on previous work and include some new changes.
The biggest difference between setting up Charles on mobile devices versus tvOS is that there is no way to download the certificate from the www.charlesproxy.com/getssl site. Instead, a profile must be installed via Apple Configurator. In order to do this, the Apple TV must first be supervised. For 4K Apple TV’s, pairing the device with Apple Configurator must also be over network. The following steps go over how to pair, supervise, and install a profile for Charles Proxy on an Apple TV. To do this, you must have already installed the latest Charles Proxy and Apple Configurator.
Pair Apple TV to your Laptop
4th Generation Apple TV and Below
1. Connect the AppleTV to your Mac via USB-C
2. Open Apple Configurator
3. The AppleTV should show up automatically under All Devices
- Alternatively, go to Apple Configurator → Paired Devices and click Pair
- Enter the code that appears on your TV screen
- Your device should be paired to your laptop and show up under All Devices
4K Apple TV and Newer
1. Connect your AppleTV to the same WiFi network as your laptop.
2. Navigate to Settings → Remotes and Devices → Remote App and Devices on your AppleTV.
3. Open Apple Configurator.
4. The AppleTV should show up automatically under All Devices.
- Alternatively, go to Apple Configurator menu → Paired Devices and click Pair.
- If the device doesn’t show up in Paired Devices, connect both your Mac and the device to ethernet and try again.
- Enter the code that appears on your TV screen.
- Your device should be paired to your laptop and show up under All Devices.

Supervise Apple TV
1. If your device has already been set up, first check if it has already been supervised (Supervision is only needed once per device).
- Follow the above instructions to pair your apple TV to your Mac.
- In your Configurator segmented controls, navigate to “Supervised.”
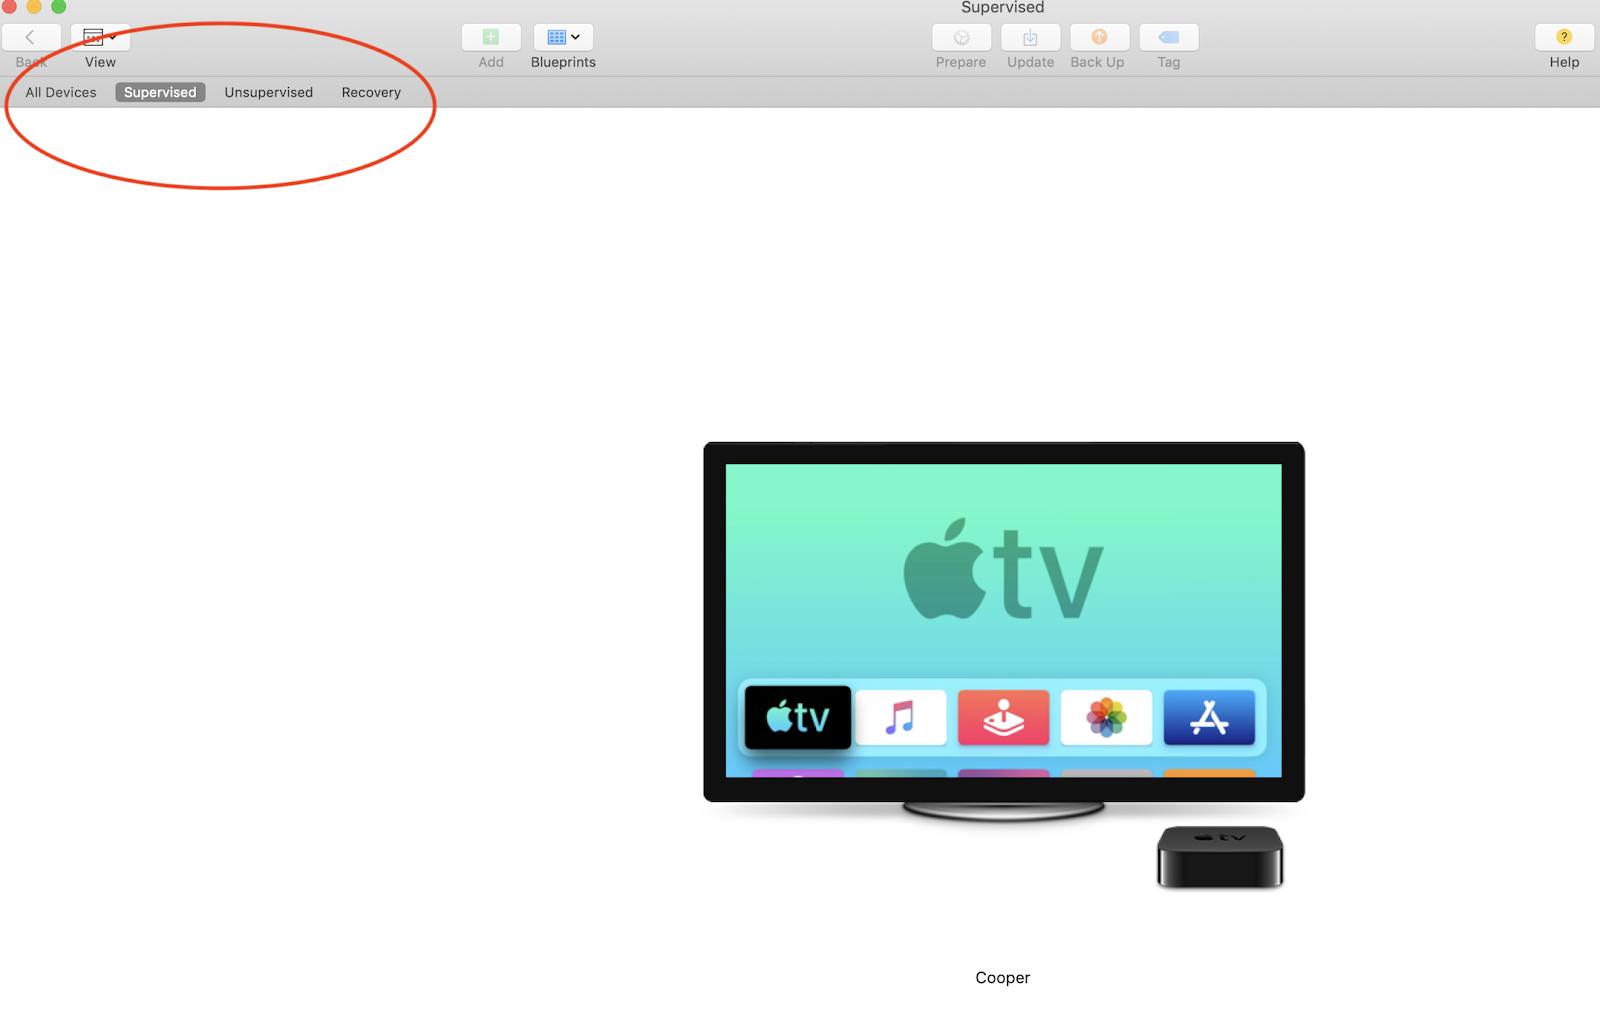
- If your Apple TV icon appears in the Supervised tab, skip this section and move to Configure your profile.
2. (4K Apple TV Only): Connect both your Apple TV and your Macbook to ethernet.
3. (4K Apple TV Only): On your device, navigate to Settings → System → Reset → Reset.
- Do not begin setting up the AppleTV yet. Open Apple Configurator.
- Follow the steps from the previous section to pair the device to the laptop.
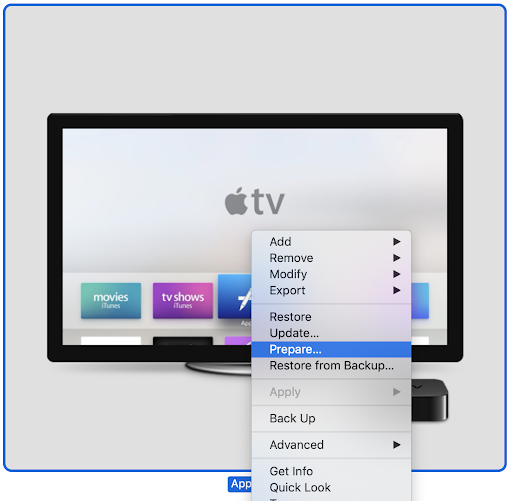
4. Select on your AppleTV icon from Configurator.
5. Right click and select Prepare from the menu. Alternatively, click the button labeled Prepare on the toolbar at the top.
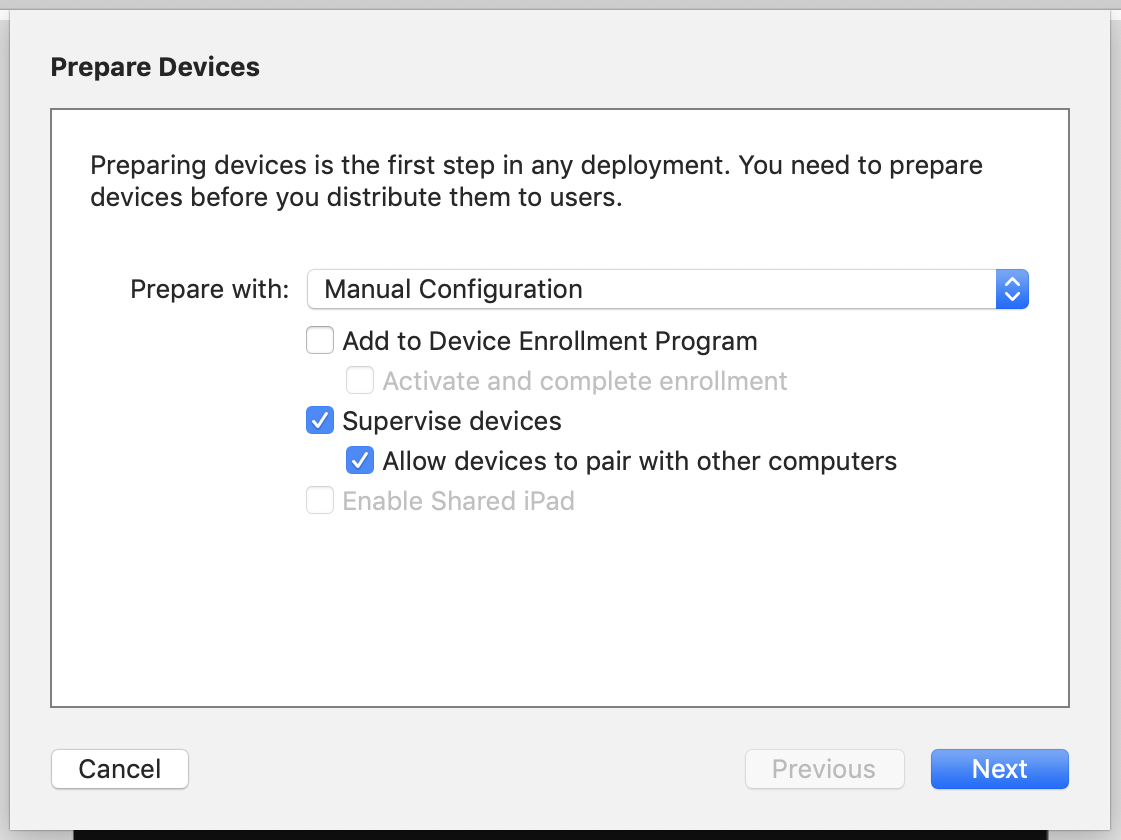
6. A dialog will show, with Manual Configuration selected from the dropdown, make sure Supervise devices and the option below are selected and click Next.
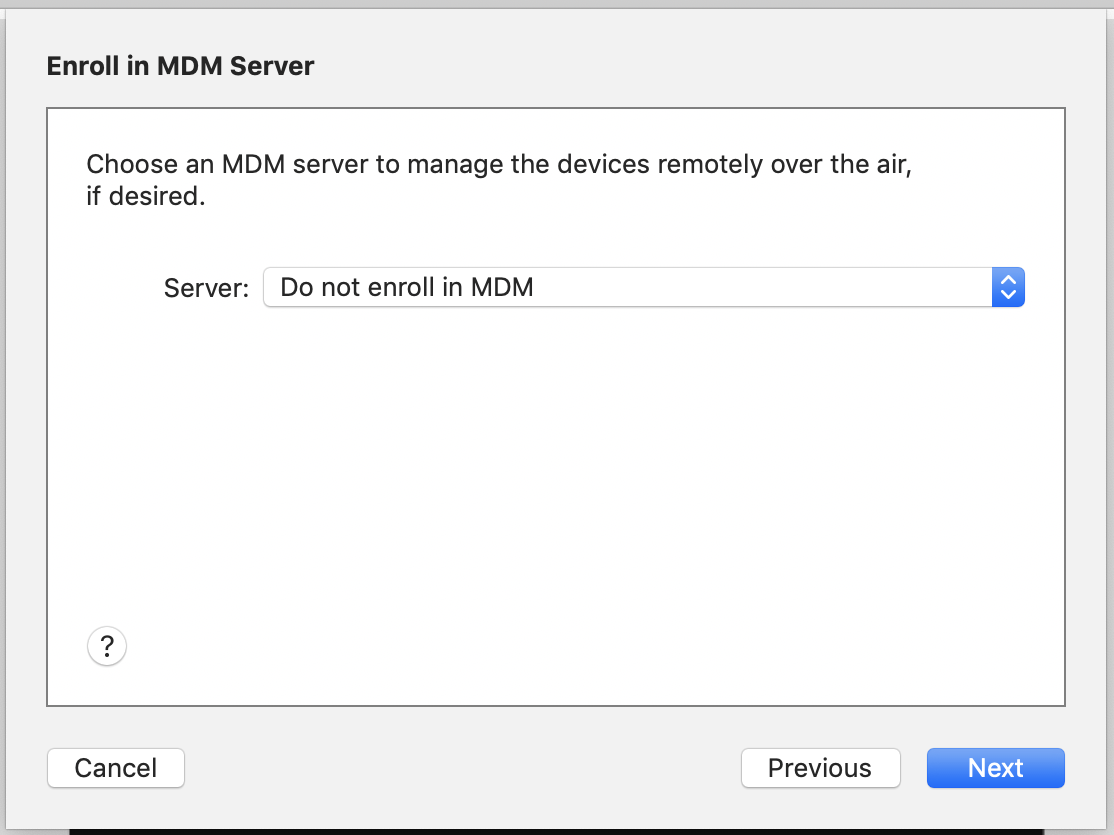
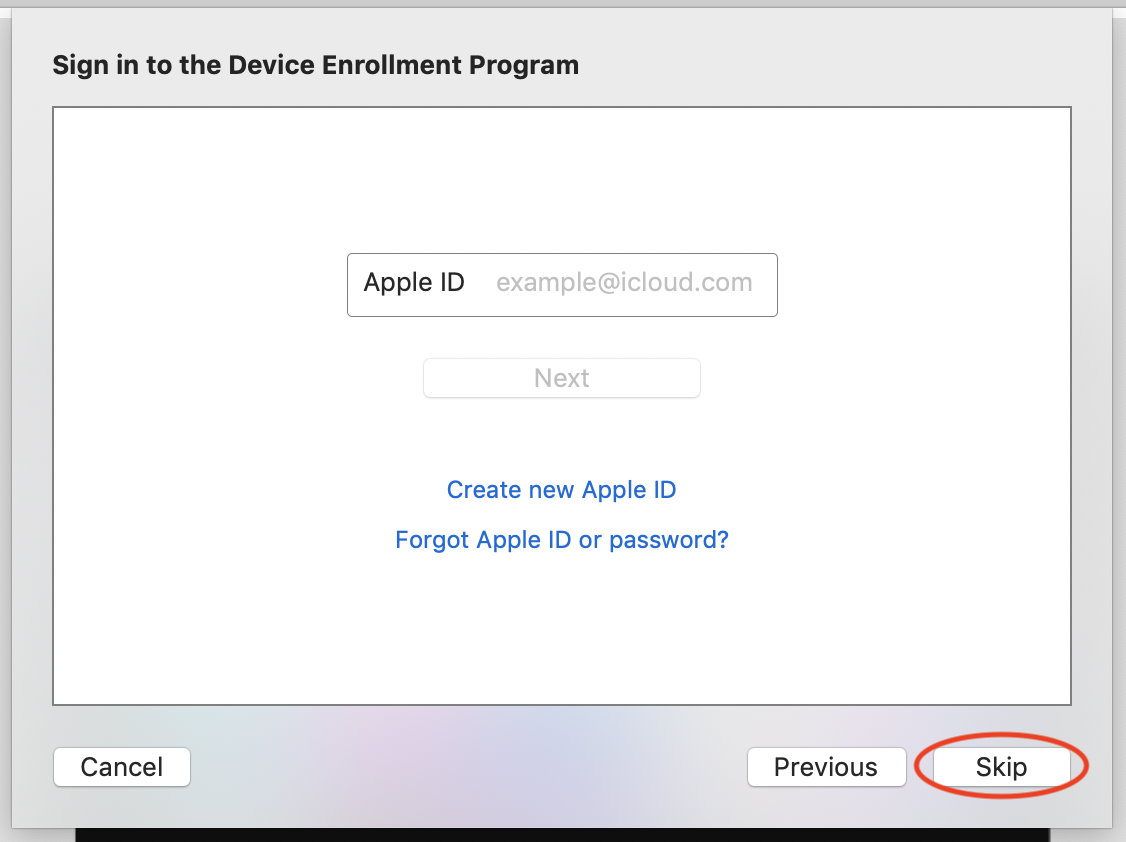
7. (Optional) The next dialog asks if you want to enroll in an MDM
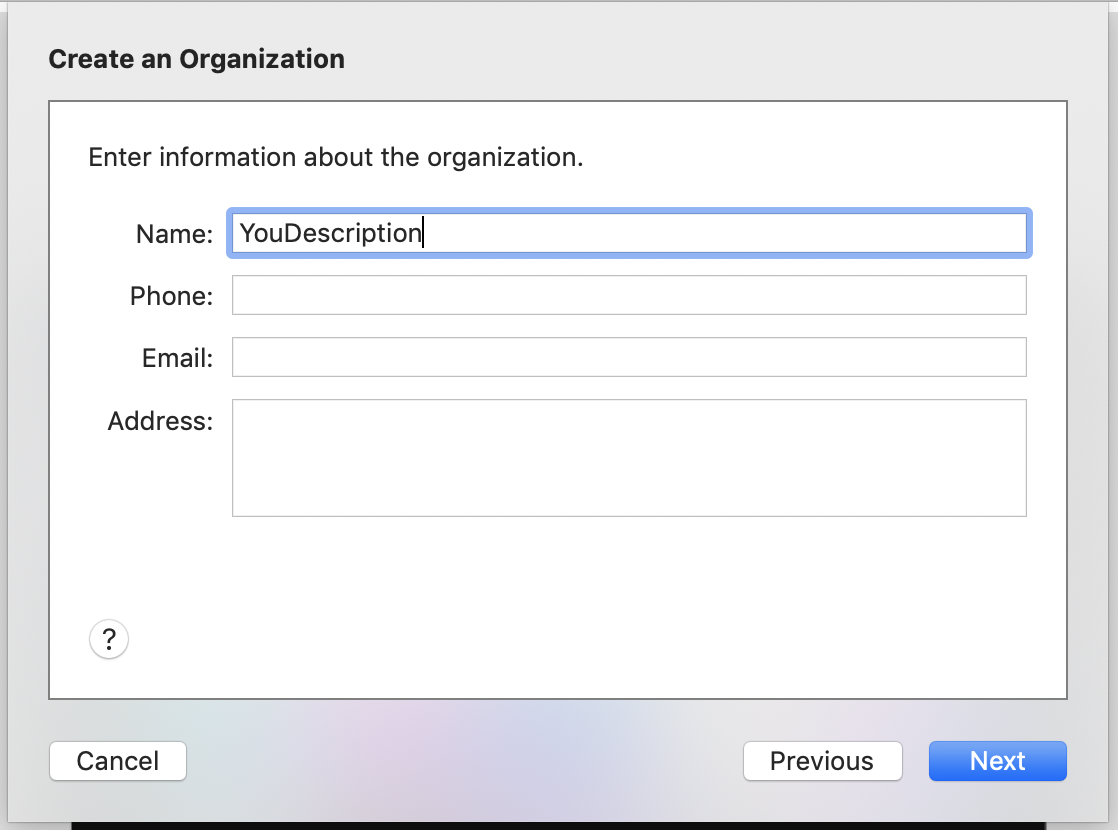
8. Next you are asked to select an Organization, this is a way to save any settings you make to use later. If you don’t already have one, leave “New Organization…” selected and click Next.

- (Optional) If you opted to make a new organization you will be prompted to Sign in to the Device Enrollment Program
- Next you will add any info about your organization. Only a name is required. Enter anything you would like and click Next.
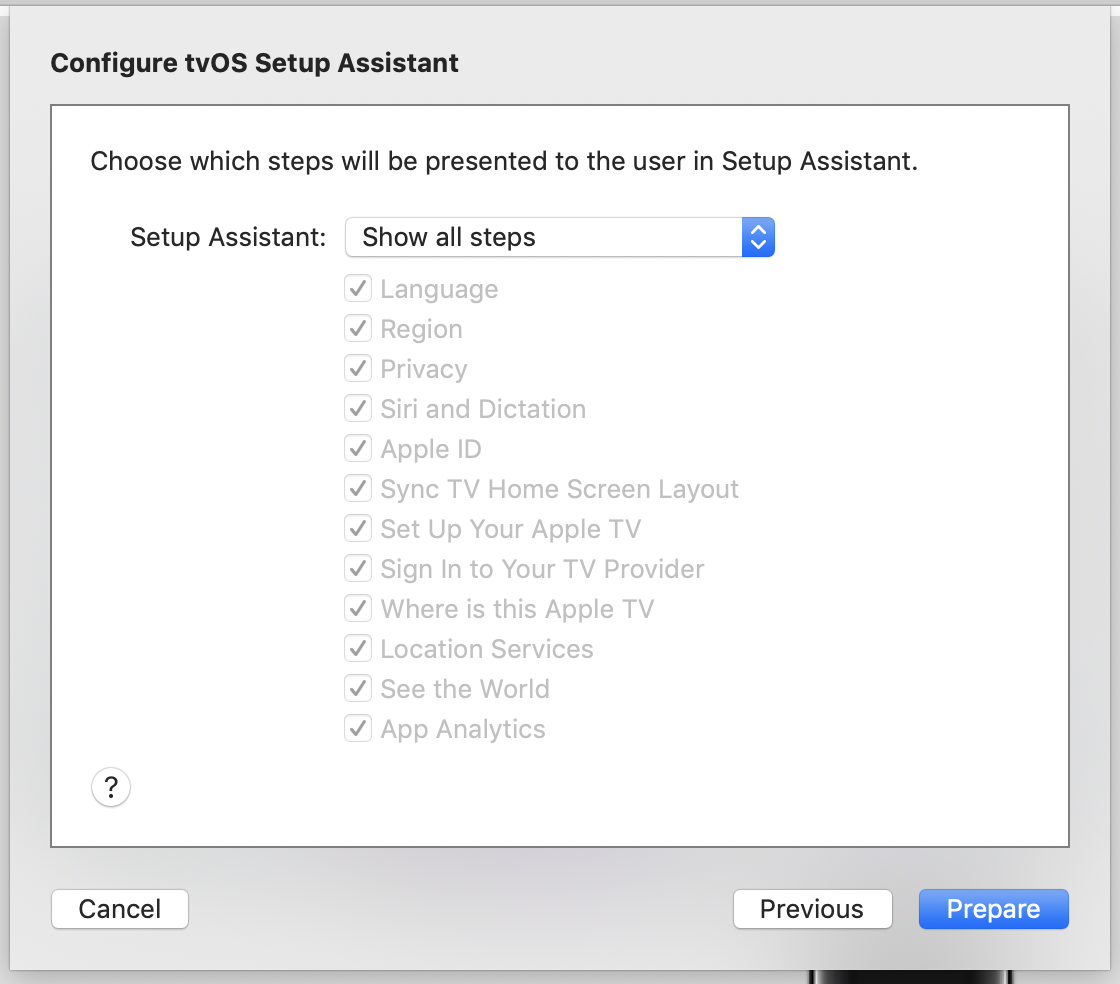
9. After you choose an organization you will be prompted to select which steps that are presented to the user, you may select anything you would like here. If you are not sure, select Show all steps and click Prepare.
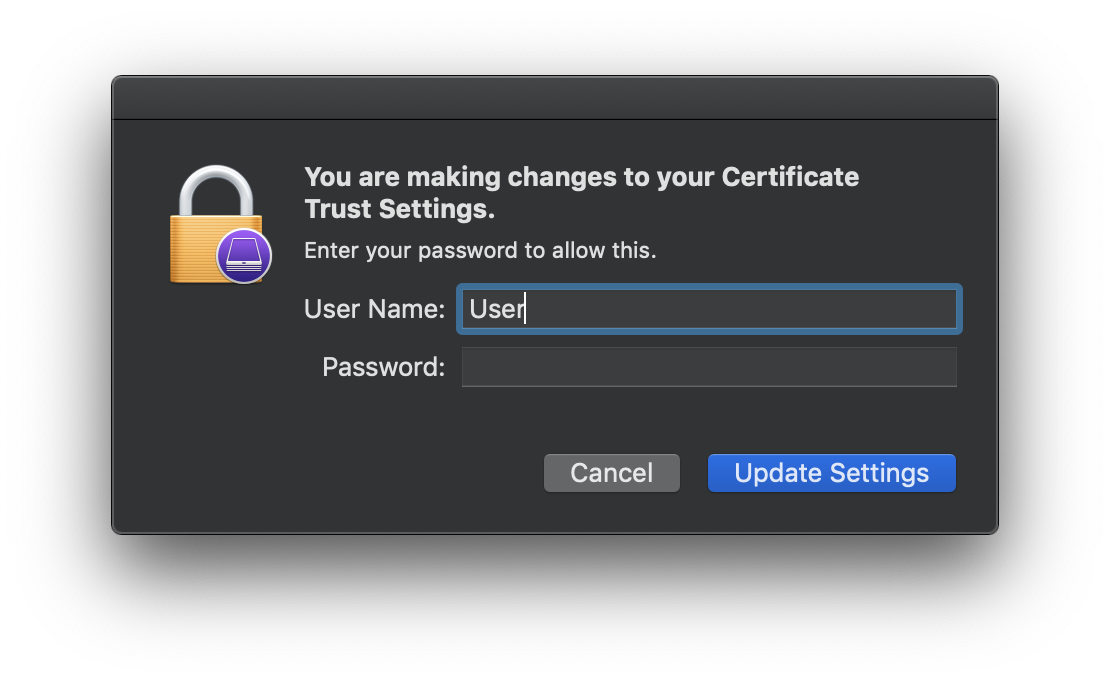
10. After selecting Prepare you may be prompted to login with a local macOS account with privileges to change Certificate Trust Settings. Login with the appropriate account and select Update Settings.
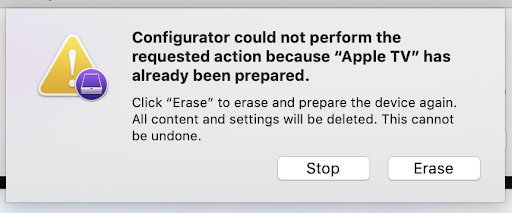
11. If your device was already set up you will see a dialog informing you that the device will be erased. Click Erase.
12. After some time the device will be prepared, now you can load your profile on it! (To check for sure, make sure that the Apple TV is shown in the Supervised tab as well as All Devices).
13. (4K Apple TV Only): Once your device has been prepared, disconnect from Ethernet if you will be using Wifi. Then pair your remote and set the device up.
Configure your Profile
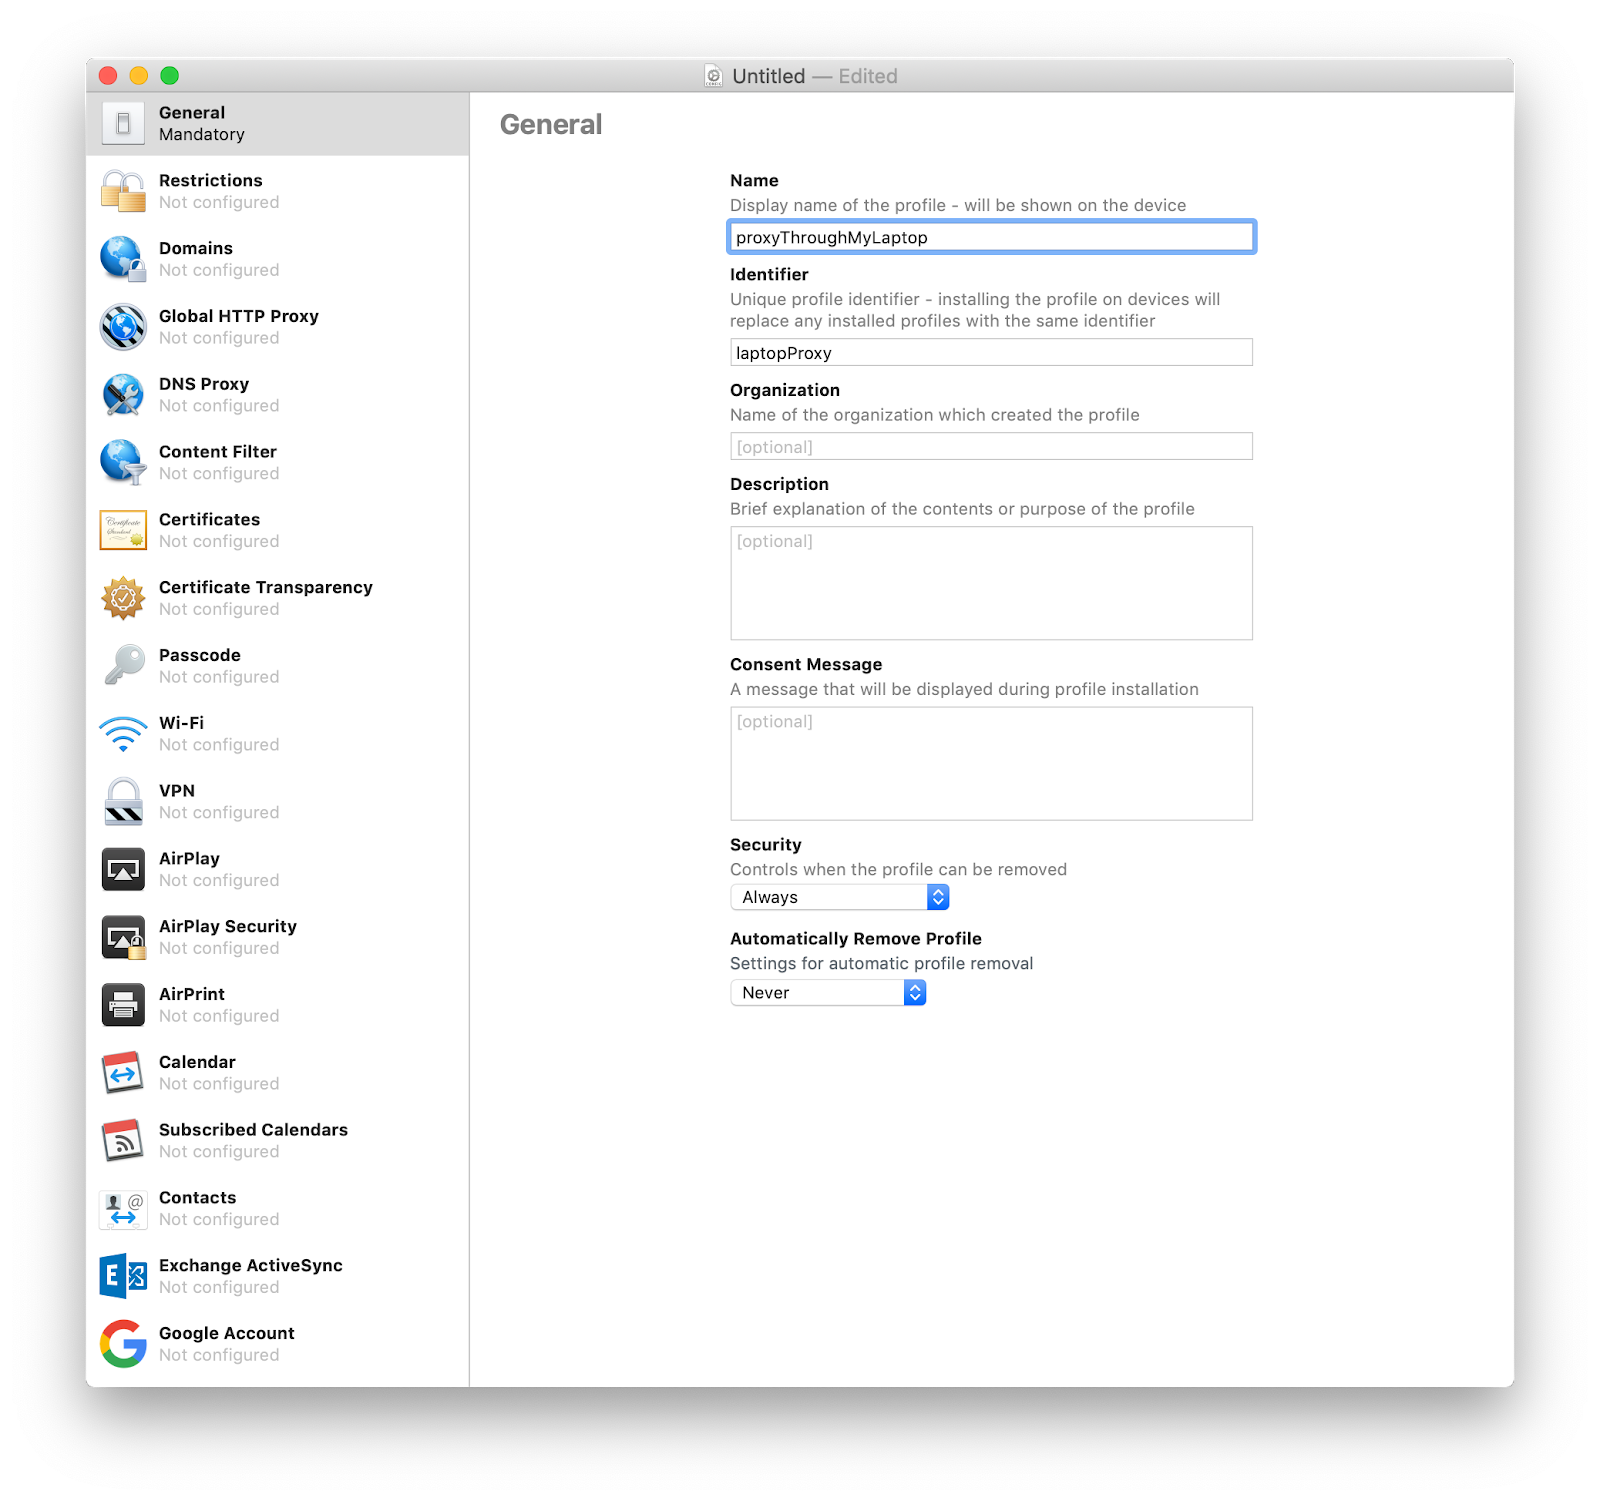
1. Open Apple Configurator. Navigate to File → New Profile
2. Give your profile a name and a unique identifier. Typically you’d want to indicate what proxy you are configuring it for.
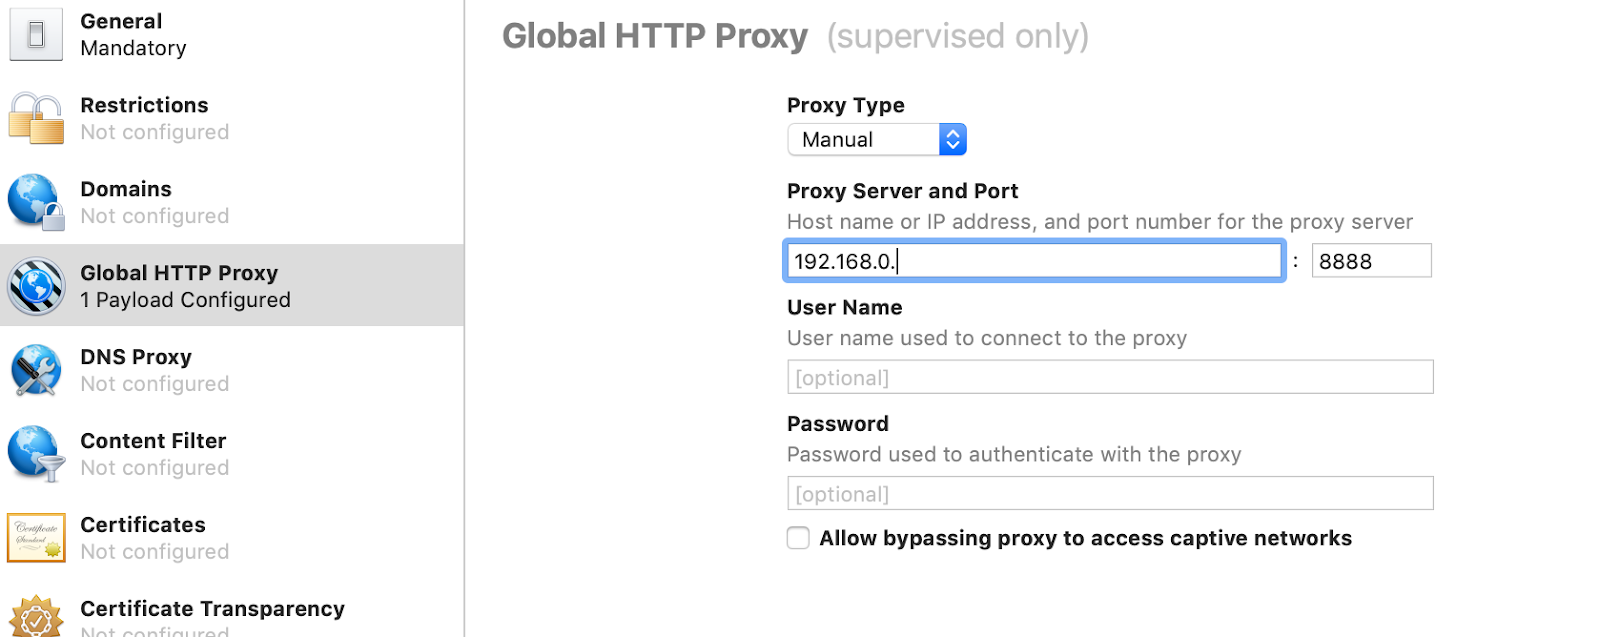
3. Select Global HTTP Proxy on the left and click configure.

4. Input the IP address of the machine running Charles (open Charles → Help → Local IP Address OR Option+Click the wifi icon) and 8888 (default) for the port
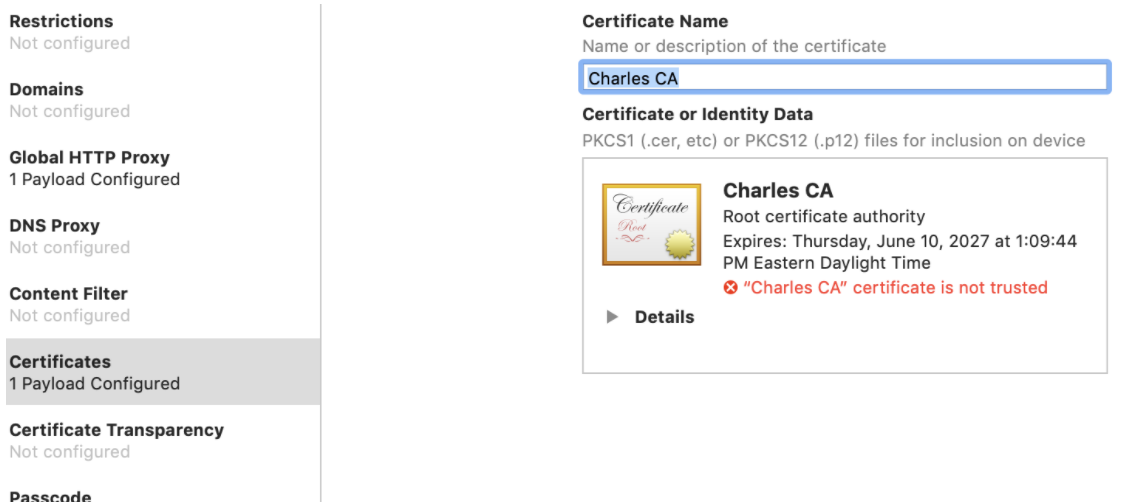
5. Navigate to Charles Proxy, then to Help -> SSL Proxying -> Save Charles Root Certificate. Make sure to save the file as a binary certificate (.cer)
6. Open up your keychain and change double-click on the new certificate. Make sure that the trust settings are set to Always Trust.
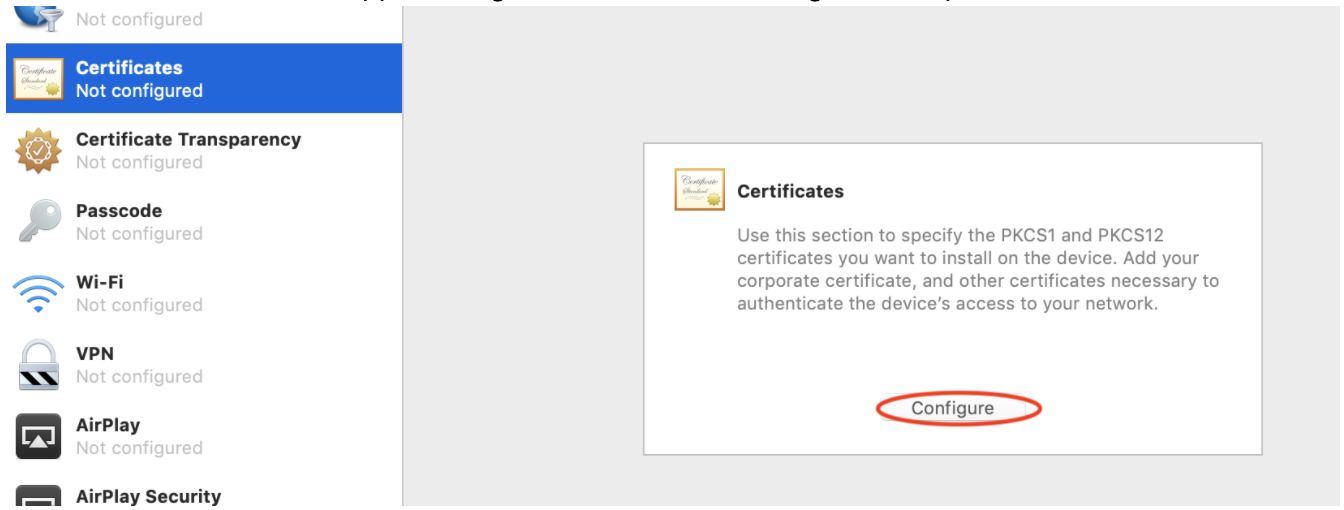
7. Navigate back to the new profile in Apple Configurator. Select Certificates, then Configure and upload the certificate in * .cer file format. Feel free to change the name to whatever you’d like.
8. Save and close the Profile. You can upload this profile from your saved location in the future, and will need to edit or create a new one if your IP address or Charles certificate changes.
Install the Profile
1. Connect the AppleTV to your Mac (refer to above device-specific directions)
2. Open Apple Configurator
3. The Apple TV should show up under All Devices and Supervised
4. Double-click on the AppleTV icon
5. Check if a Charles profile has already been installed onto the AppleTV, and if so, remove it
6. Click the back arrow, then select on your AppleTV icon
7. Select Add -> Profiles on the left-hand menu
8. Right click and select Add → Profiles from the menu. Alternatively, click the button on the toolbar at the top labeled Add and select Profiles

9. Browse and find the profile you created above and click Add
10. If you’re setting up on tvOS 12 and above:
- From your Apple TV, navigate to Settings → General → About → Certificate Trust Settings
- Select Charles CA (Not Trusted) so that it changes to Charles CA (Trusted)
11. After a moment or two it should succeed.
12. Restart your Apple TV
13. Restart Charles Proxy
14. Congratulations, now you can view SSL traffic coming through your AppleTV! After using the proxy you can remove your profile from the AppleTV (General → Profiles → Select Profile → Remove).
Happy Proxying! If you have any feedback or questions about this post, don’t hesitate to reach out to info@willowtreeapps.com, and we’ll help however we can.
