
Adding Android Auto capabilities to an existing app can seem simple and confusing all at the same time.
Here we share some of the tidbits we learned while adding Android Auto support to an existing app with the hope that it will be useful to others in the future.
What is Android Auto?
To start, Android Auto is not Android Automotive. Is this confusing? Google thinks so: https://source.android.com/devices/automotive/start/what_automotive#android-automotive-android-auto
It's worth noting that development for Android Auto sets you up for success with Android Automotive as well, since they use the same "CarAppService", however Android Automotive will need a separate module within your project. If you know you'll want to support Android Automotive in the future, setting up your Android Auto code in a library module would be a good idea to help decouple it from your main app code and share it with future Automotive development! More info on Android Automotive development can be found here: https://developer.android.com/training/cars/apps/automotive-os, but we'll be talking mostly about Android Auto here.
Key Concepts
We won't re-hash the quality Google documentation found here: https://developer.android.com/training/cars/apps#key-terms-concepts
One concept worth calling out is the Host. The Host runs your app, controls its lifecycle, implements the Car Library's APIs, renders your Templates, and informs your app of user interaction. You can think of this analogously to what the Android system does for your standard Android apps. Android Auto is a Host, and Android Automotive also includes a system app that serves as the Host, allowing the Car Library to function with both.
The interesting thing is that other Hosts can be implemented as well. For example Harman, of Harman Kardon fame but now owned by Samsung, has a platform known as Harman Ignite, that is also a Host, and therefore allows developers to distribute Android Auto apps with minimal additional effort.
Another concept worth repeating from the docs are Templates. Templates are models for UI. Android Auto doesn’t leverage the View system that Android does. It renders less flexible, pre-built components that correspond to these models. This constraint is something you and your team will need to be aware of when designing the user flows within your app. Google offers a great resource to reference the available Templates and their restrictions here.
Notes on Setting up Your Dev Environment
Most of what you need to know about setting up your dev environment can be found in the docs here: https://developer.android.com/training/cars/testing.
Here are some important things the docs do not mention or are not clear about that you may want to know:
- If you are on an emulator, you need to side-load the android auto app (com.google.android.projection.gearhead) as the version installed by default on emulators does not work correctly
- In the android auto app’s developer settings (see https://developer.android.com/training/cars/testing#running-dhu) you must enable “Unknown sources” to use the Desktop Head Unit (DHU)
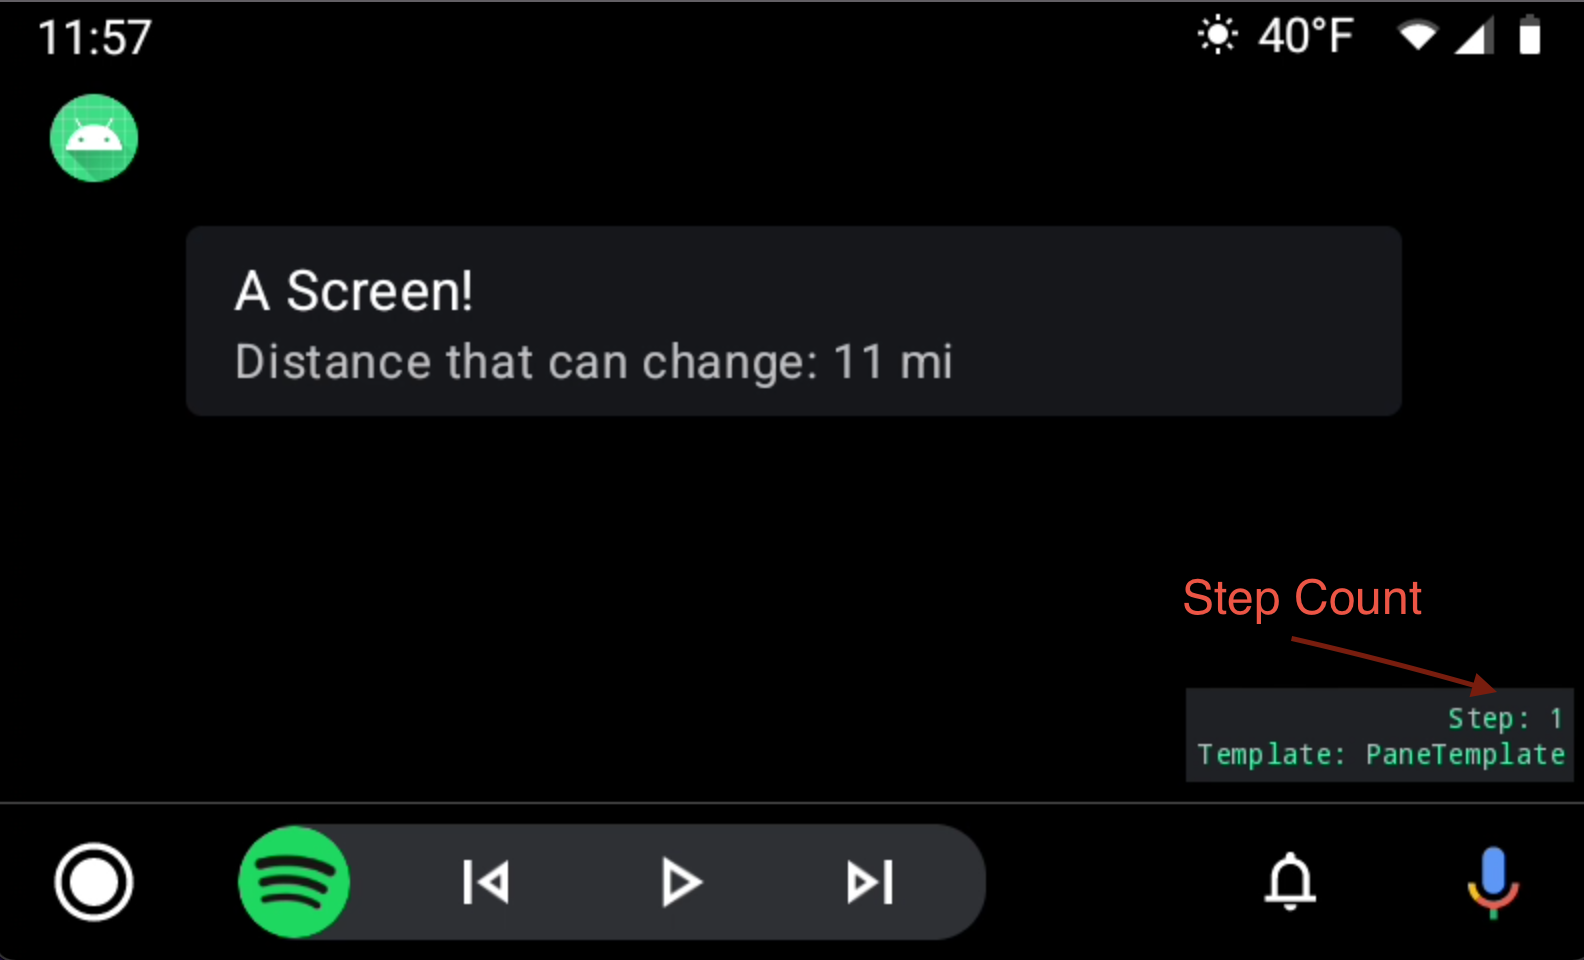
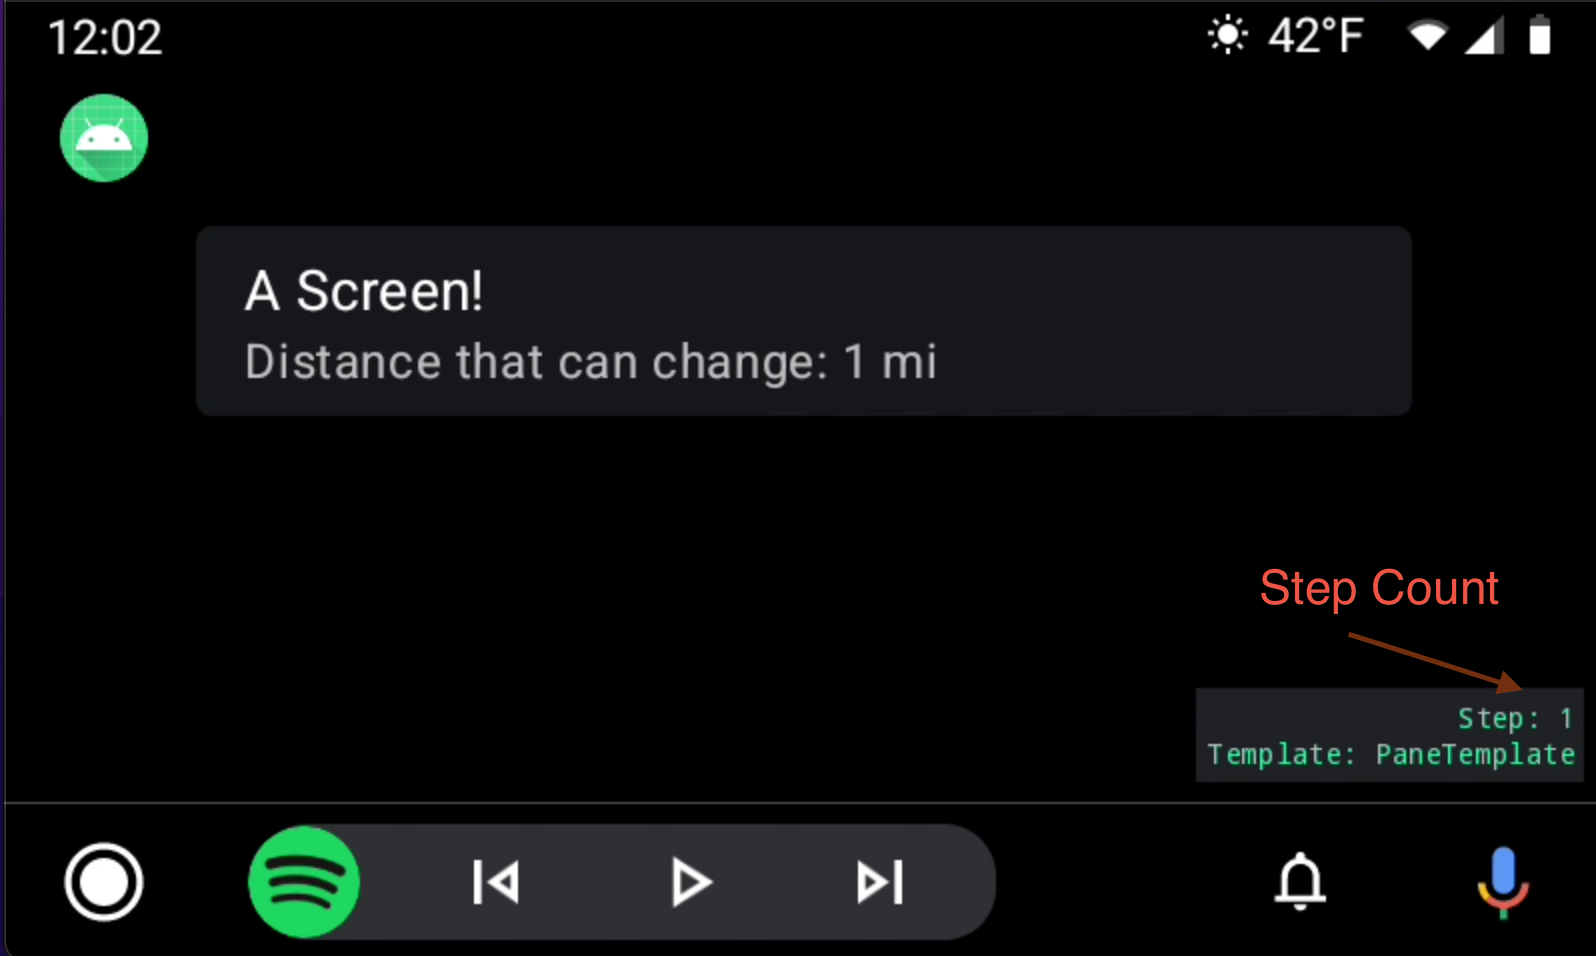
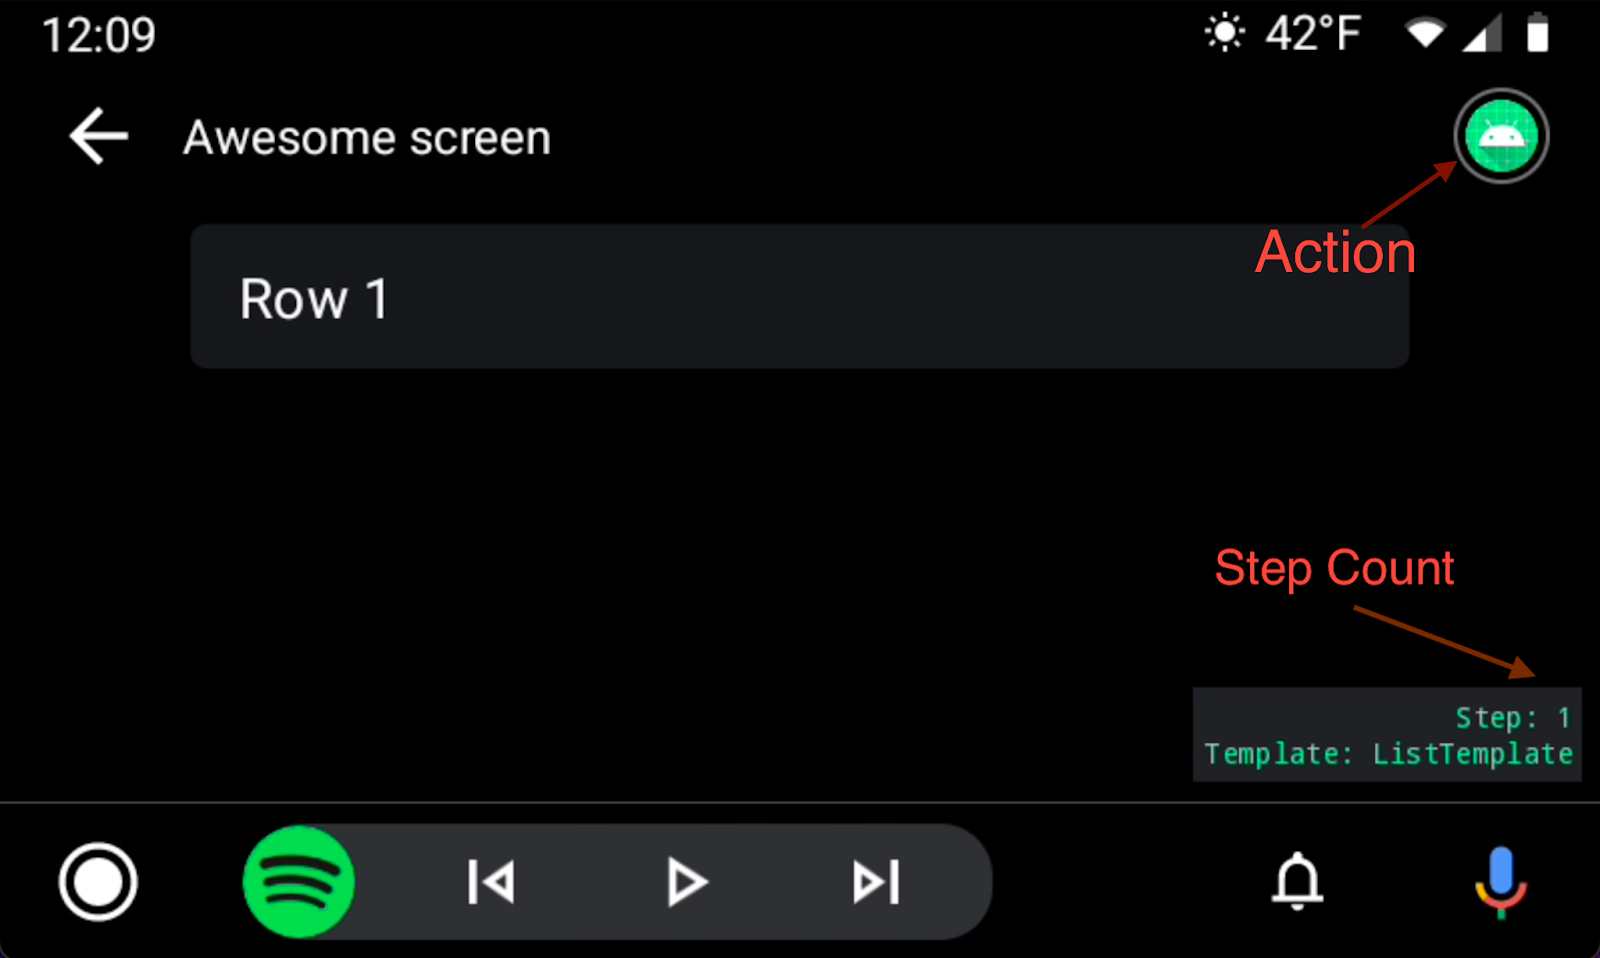
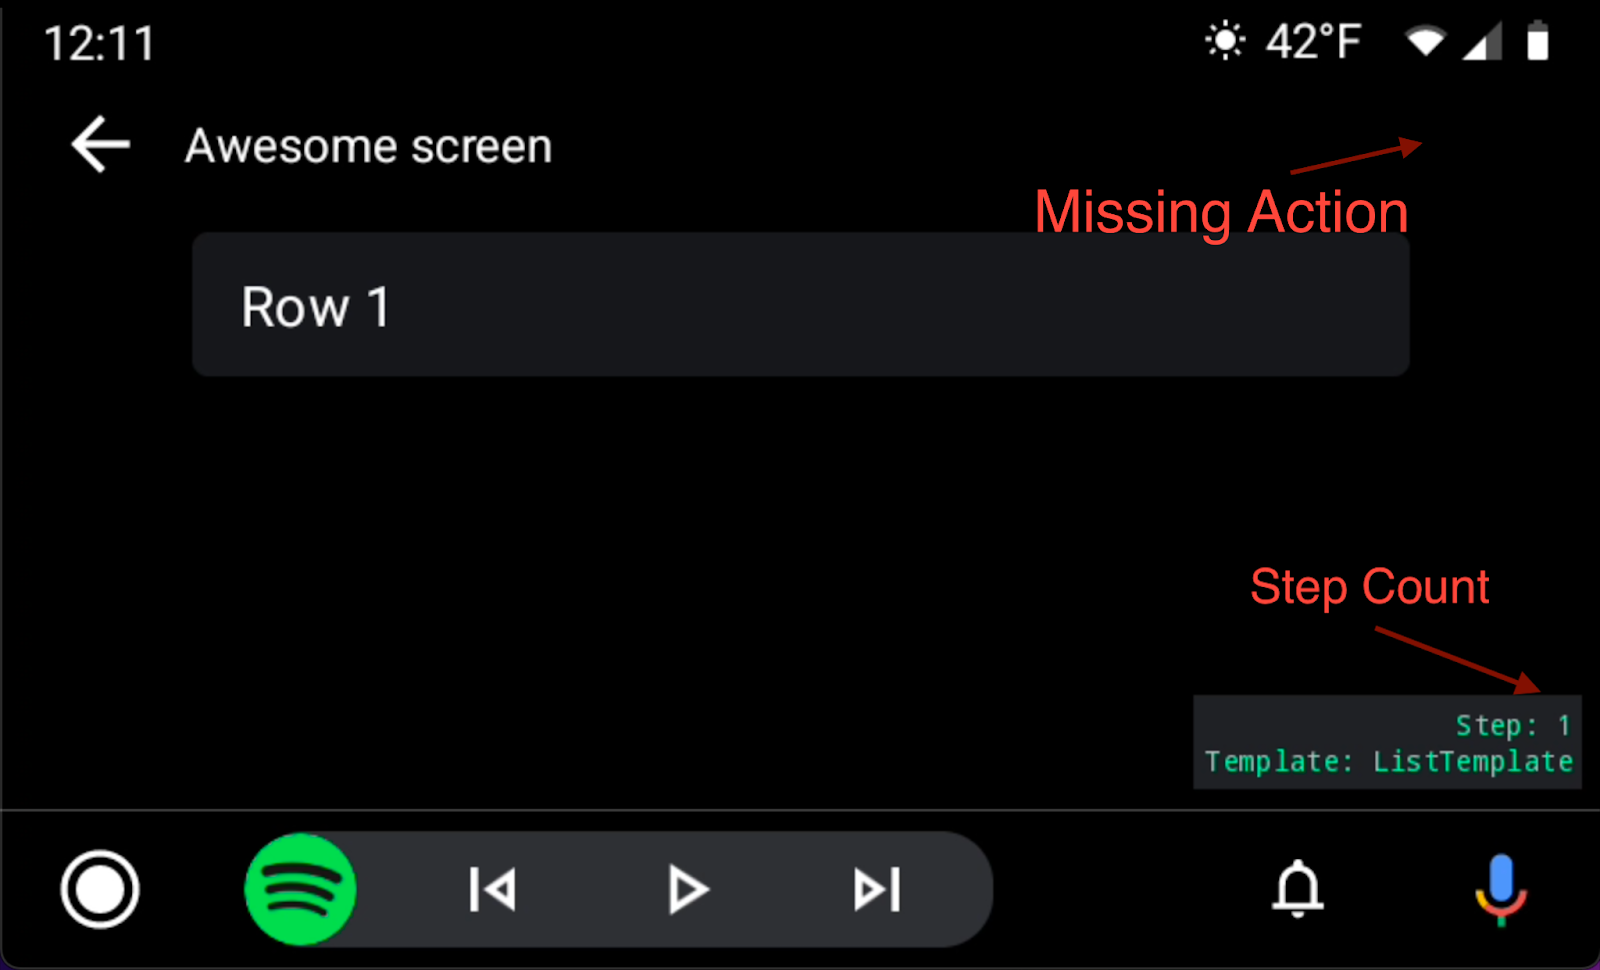
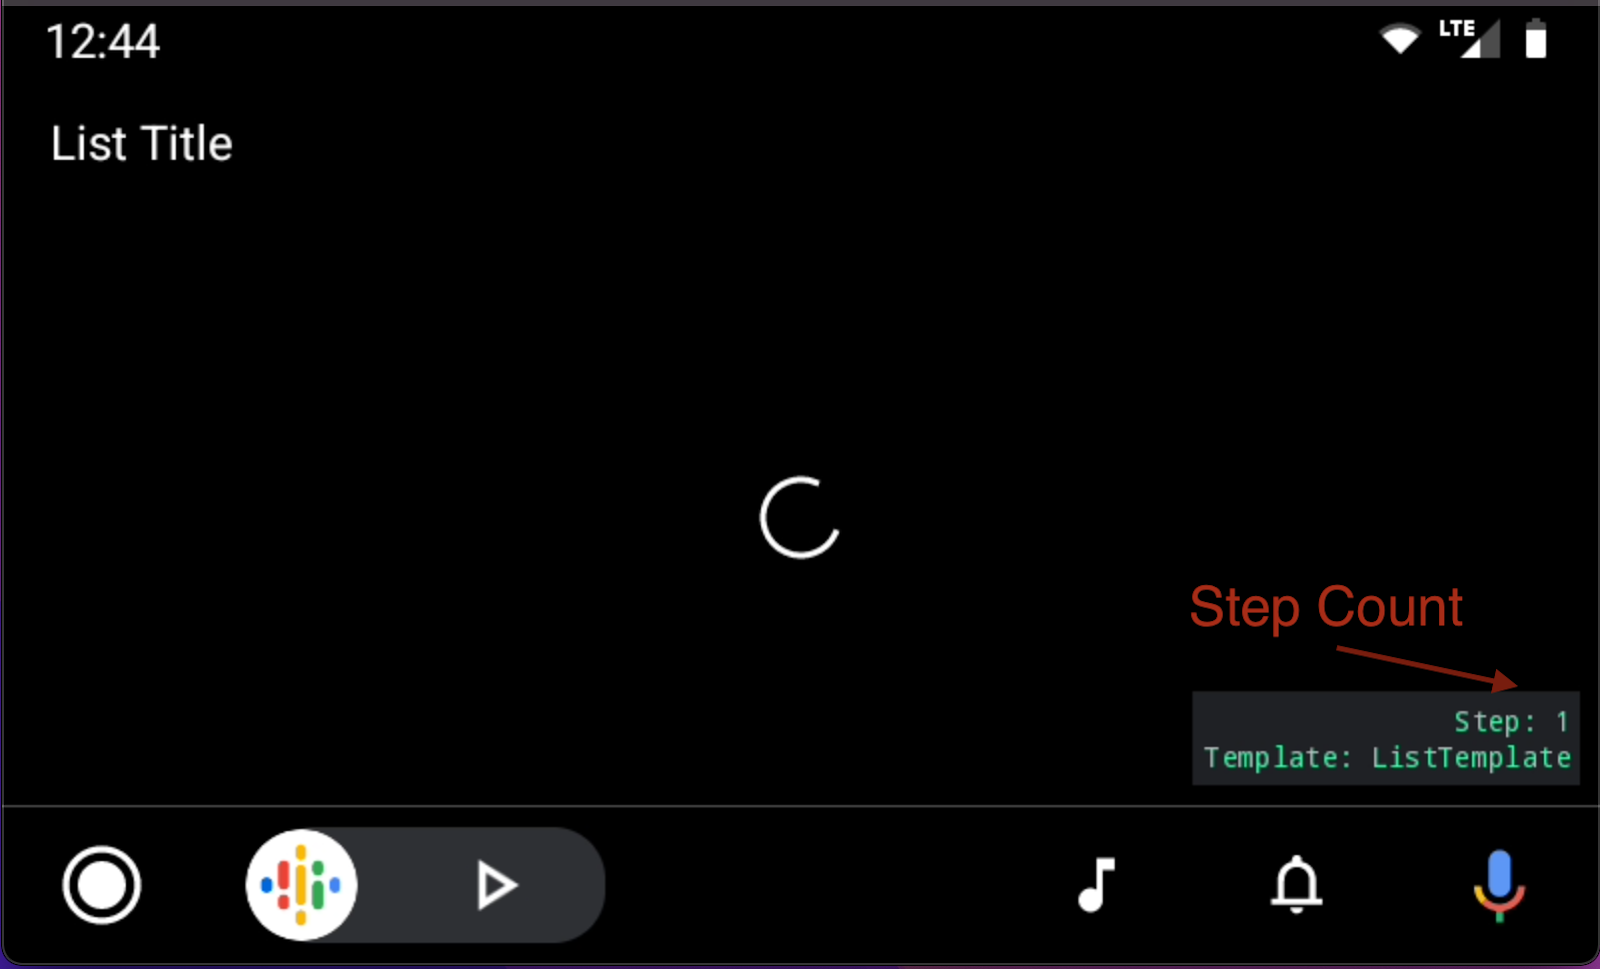
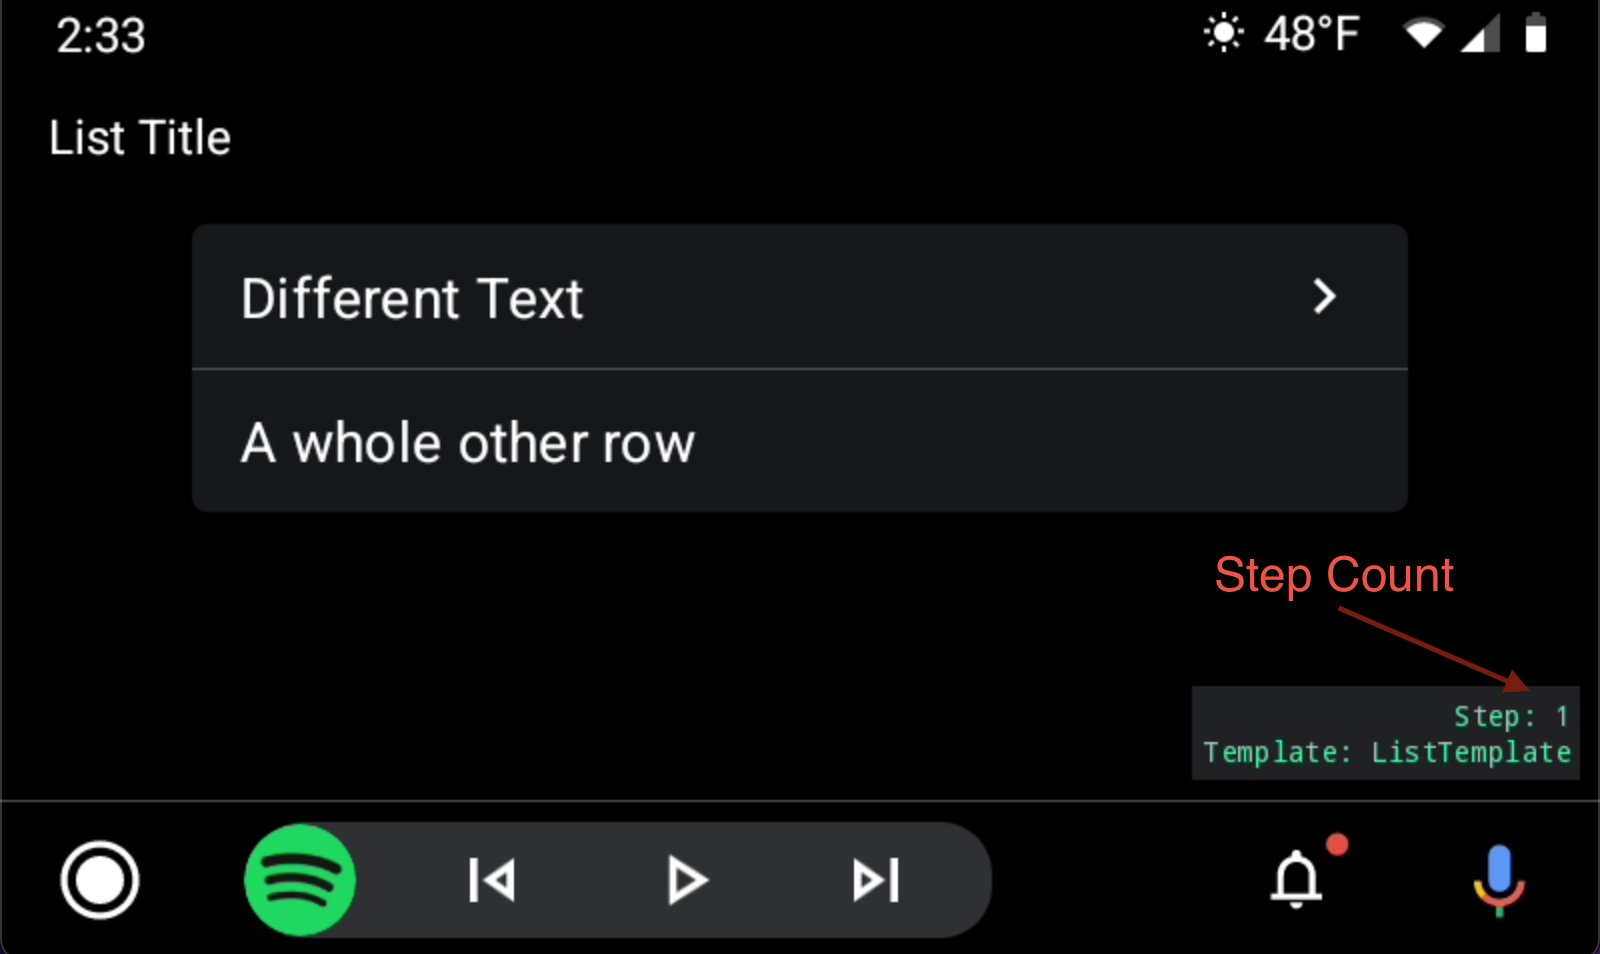
- It is helpful to check “Enable debug overlay” in the android auto app’s developer settings in order to see your app’s step count
Things We Learned About Template Restrictions
Android Auto caps all apps at a limit of 5 navigations deep to help reduce driving distractions. If your adventurous app happens to go past this cap at any point, Android Auto will kindly tell it to stop by striking it down.
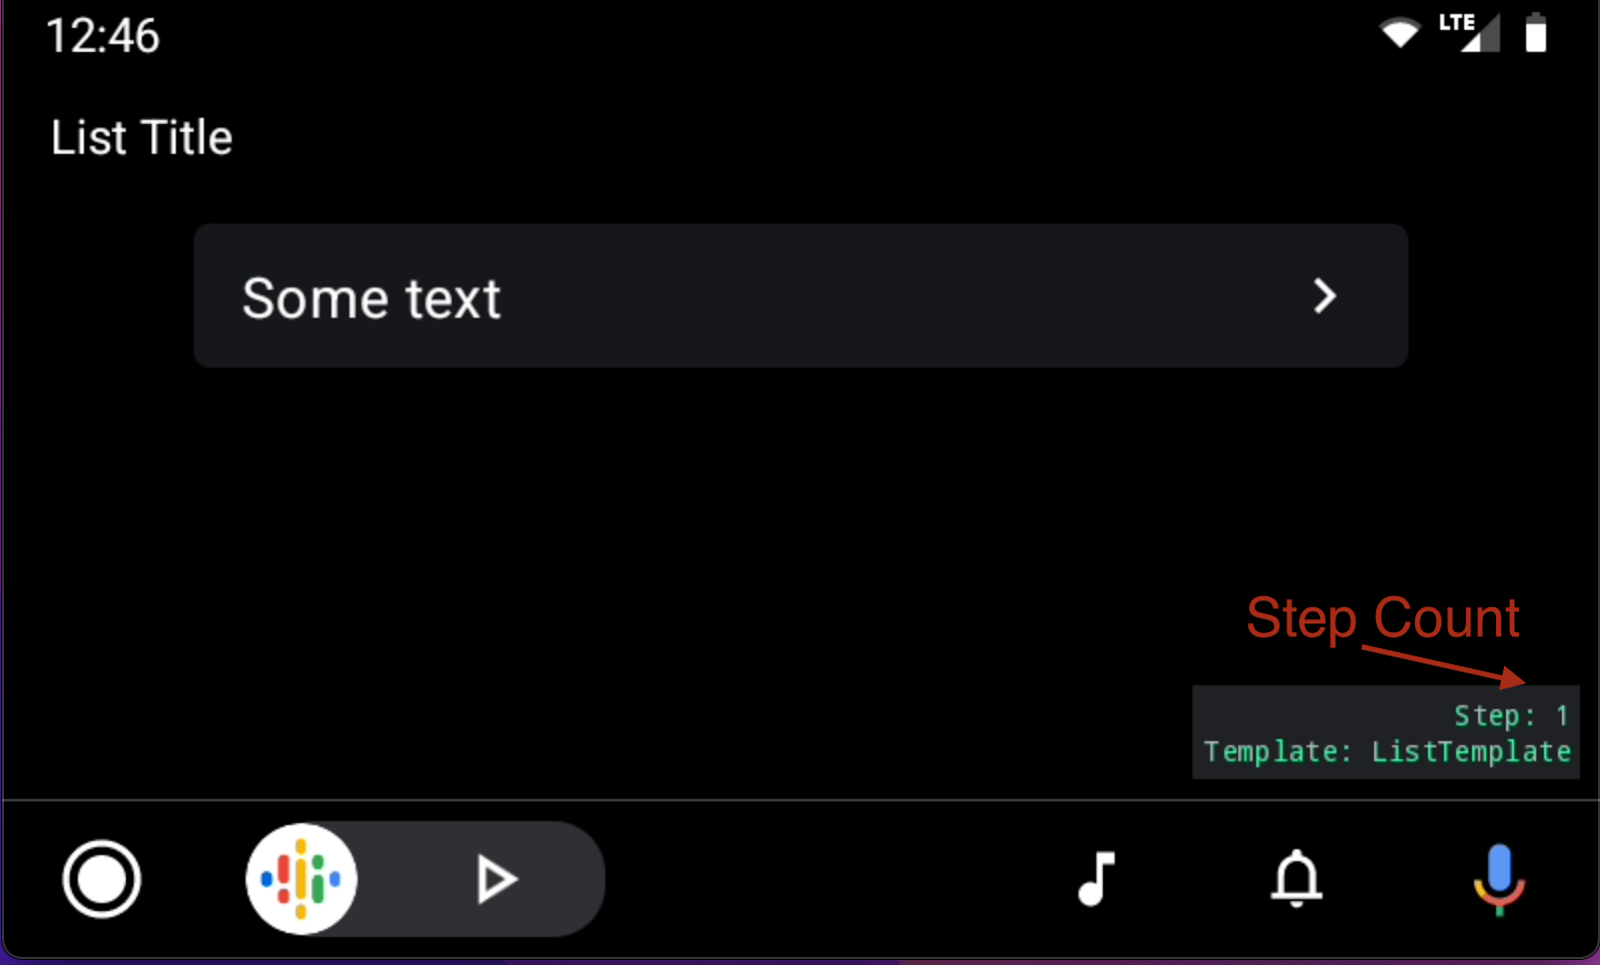
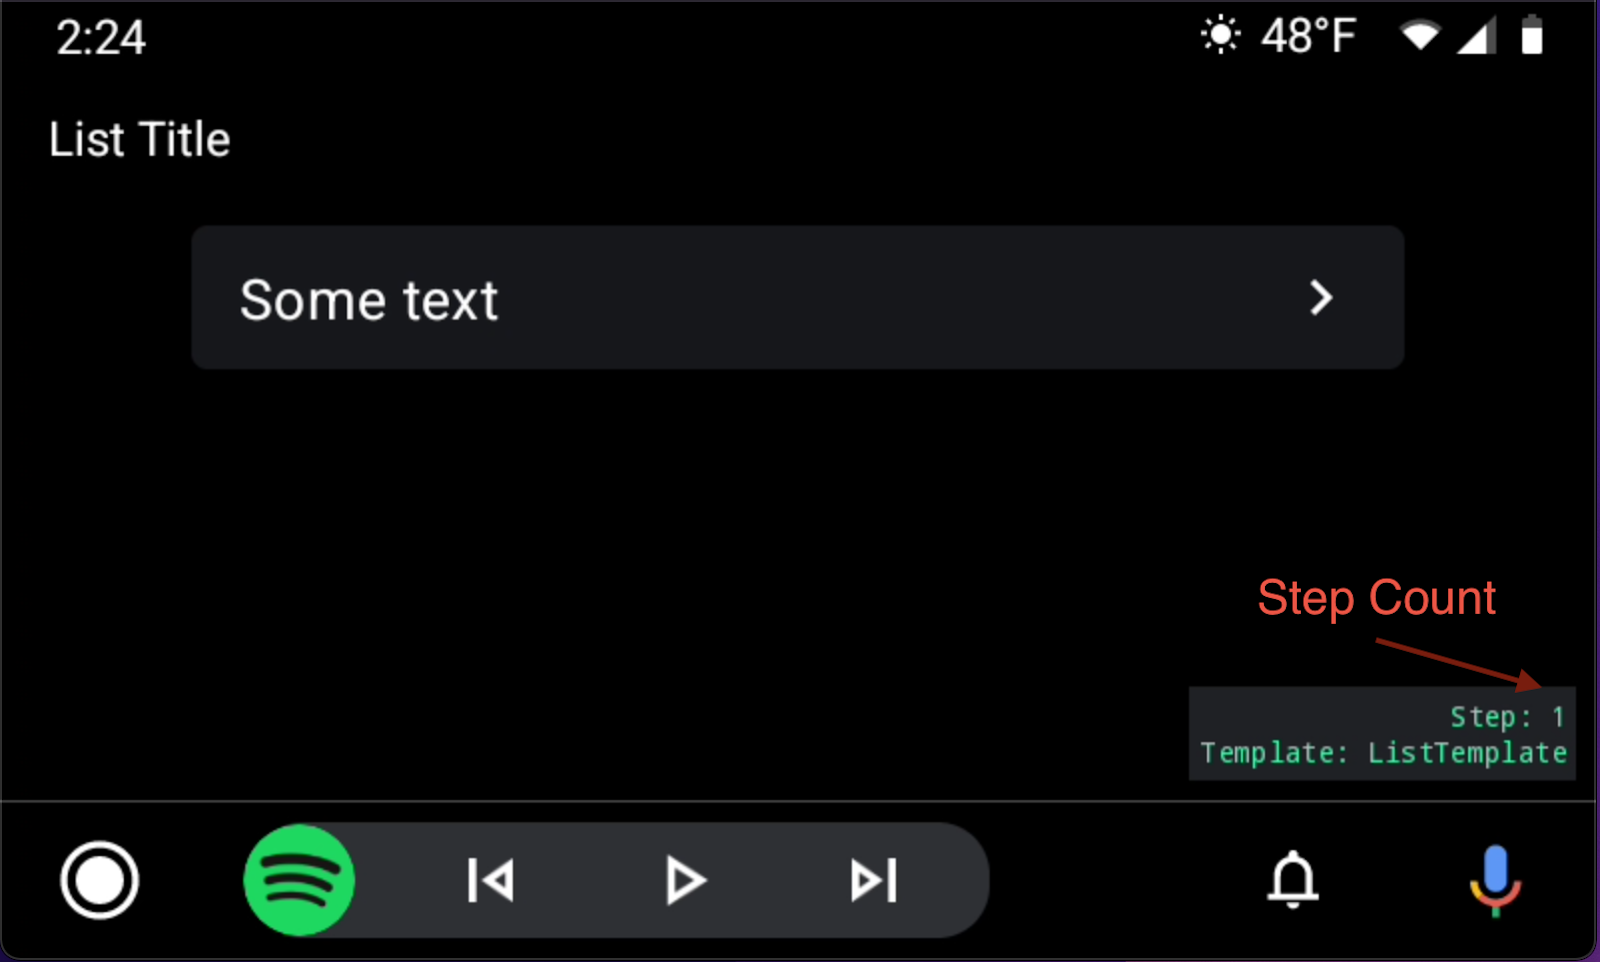
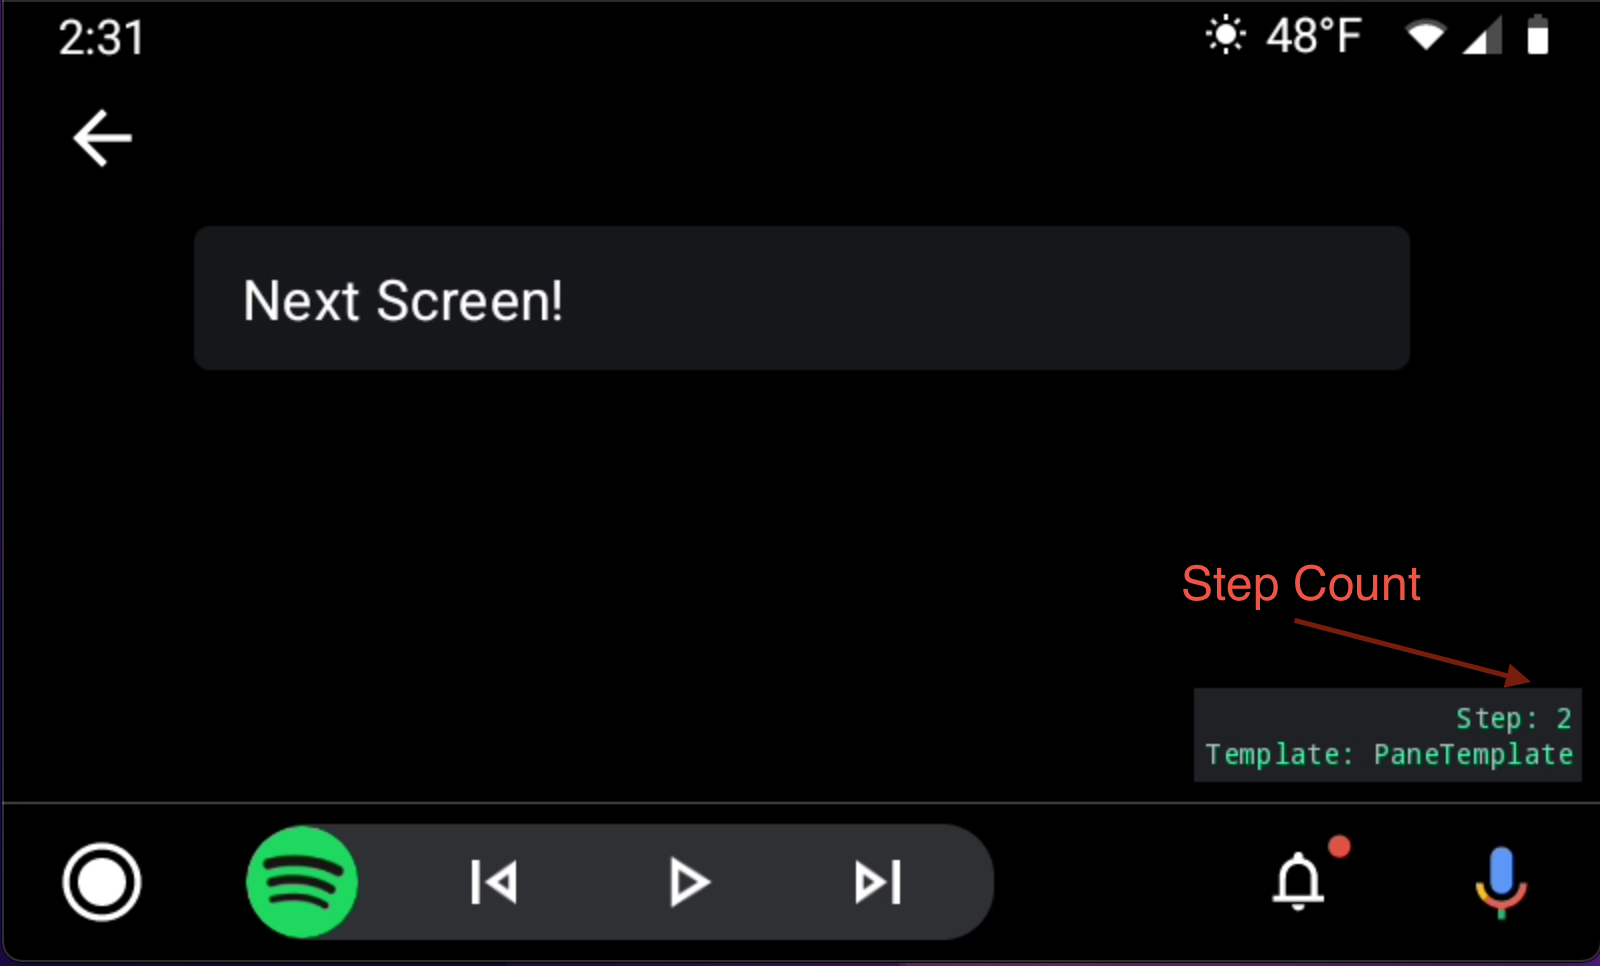
The docs make the important distinction that this step count is not the same as the number of screens in the back stack. Instead, the step count changes whenever you start showing a new Template. In short, there are two ways to add a “new” Template:
- Pushing a new screen, which could add some number of Templates
- Changing information in an existing Template (For example, changing the Template’s title)
Whether or not changing information in a screen counts as a step is dictated by a given Template’s Template restrictions. There are many useful cases where changing information in an existing Template will get around that Template’s restrictions and will not increase the step count. Here we will try to include most of the ones we came across.
Spans can change (sometimes)
Things like text color, or the numerical distance to something (from a DistanceSpan) will not normally count towards the step count when they change.
Some fields do not support spans at all, and so text changes there add to the step count:
- Screen titles
- Message Template’s message
Actions can change
Actions in a screen can have their icons change, or even fully appear or disappear without affecting the step count.
In one screen, we were able to update the icon of an action based on state, before the rest of the screen finished loading.
Loading states
A loading state can be shown before any Template, and transitioning from that loading state does not count as a step. For example, a Template cannot update any list items, but it can start in a “loading state” without list items, and transition from a loading state without affecting the step count.
Back navigation to a similar screen
This can be a useful one to know. A screen can update to show completely different content when a user navigates back to it, as long as the Template type remains unchanged.:
One flow in our app involved navigating forward from a detail screen to a list of choices, and then forward again to a similar detail screen, updated with information about the choice on it. The ability to update a Template’s content on back navigation allowed us to instead navigate forward to the list of choices, and then navigate backwards to the detail screen when the user clicked their choice, updating the old content of the detail screen. Taking advantage of this behavior helped reduce the maximum length of the flow after this point by two whole steps!
Without being able to change a Screen’s content when navigating back to it, a master detail flow like this would not be possible to implement without hitting the step count limit.
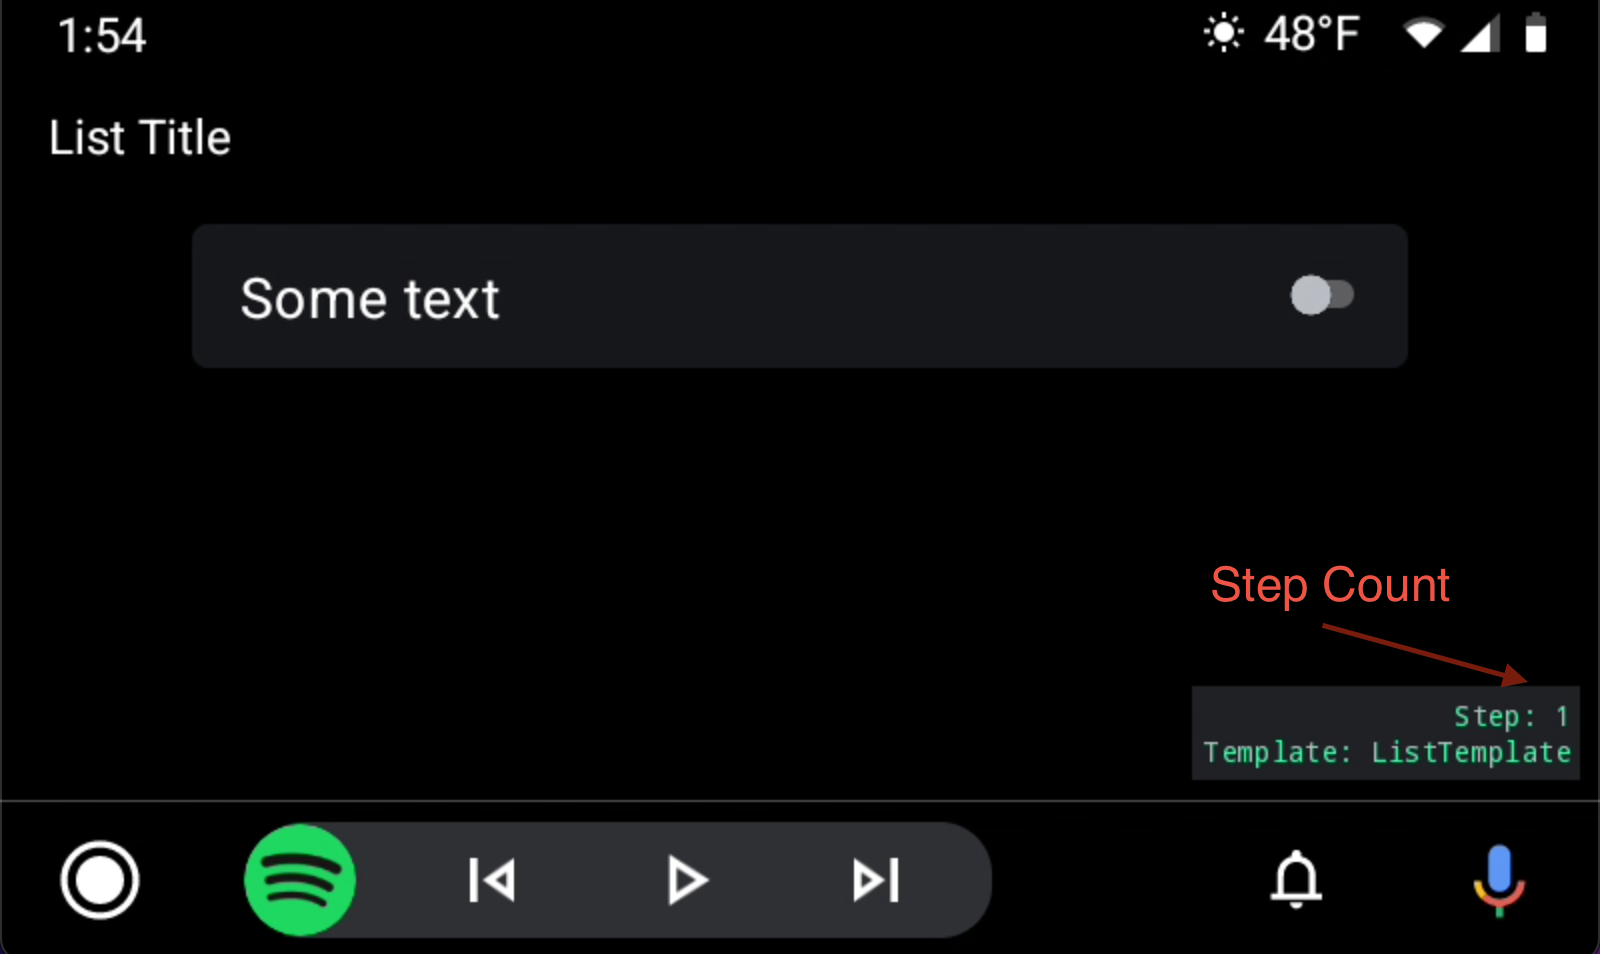
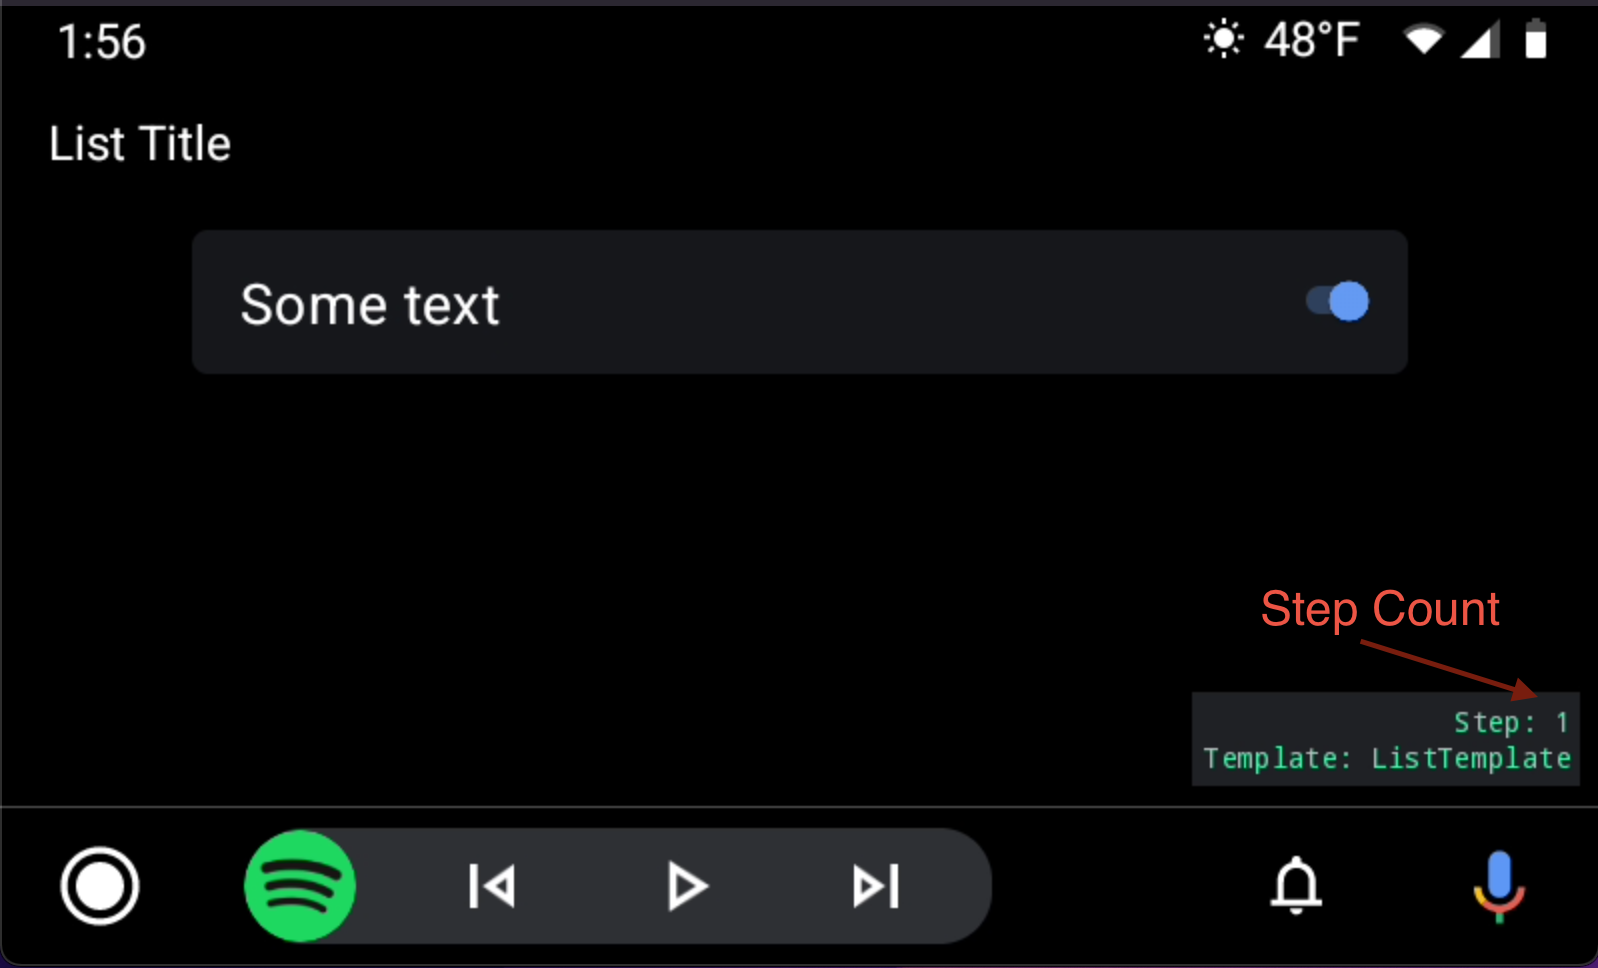
List items can be toggled/untoggled without affecting the step count
This behavior was useful in that toggle states for user filters and settings could update dynamically in Android Auto if they got changed in the app, unlike with bigger content changes in other screens.
User location
The user’s location and focus point in a map can be changed and set without updating step count.
The 5th and final “step” is more restricted than the rest
The fifth (and last) Template in a flow can only be one of the following:
- NavigationTemplate
- PaneTemplate
- MessageTemplate
Architecture
Maybe you're adding Android Auto to an existing app like us, or maybe you're starting from scratch. Either way, here are some architectural recommendations based on our experience.
Put your auto code in a separate module
This allows you to share the code more easily between AA and AAOS, while helping enforce other feature modularization that results in a smaller AAOS app.
Watch out for over-reactivity
If you're using a reactive architecture like LiveData, Rx, or Flow, you need to be careful that re-emissions of data don't cause unexpected Template updates and increment your step count unintentionally. Next thing you know, your app is closing before you get to the end of a flow! This can be caused by a number of things including state changes driven from the handset app, circular reactive dependencies, or others. Most often these things won’t have negative side-effects on the handset, but Android Auto’s Template restrictions mean you need to stay on top of this.
Our recommendation during all of Android Auto development is to enable the Android Auto debug option for showing the current stack count. Beyond that, make sure that you're unsubscribing from your streams once you get the data necessary to show the Screen, and make sure it's coming into the Screen all at once. You cannot partially load a Screen, and then load the rest without double counting the transition.

CarViewModels
Android Auto Screens don't have an equivalent to ViewModels like you'd be able to retrieve from a Fragment or Activity. We created a "CarViewModel" class to extend and use in our Screens.
A CarViewModel serves the same purpose that a ViewModel would as described here: https://developer.android.com/jetpack/guide#ui-layer. For each screen, we found it useful to create a model called “ViewData” to represent the screen state (this is commonly referred to as a view model, architecture components’ ViewModel class naming be damned). The ViewData has a 1:1 relationship with the Template such that when the ViewData model is updated, it triggers a screen refresh. Using this ViewData also made testing screen logic straightforward; in a unit test we could create an instance of a CarViewModel with fake dependencies passed in, manipulate the state of the CarViewModel, and see if the ViewData for the screen updated to match what was expected.
This CarViewModel setup also made dependency management very simple - we could have dagger inject dependencies into the CarViewModels, just like we were doing in the base app. In order to allow for passing in CarContext and any other manual args along with a dagger-injected ViewModel, we used dagger’s assisted injection.
With assisted injection, the first screen factory was injected as a field in our CarAppService implementation, and any other screens or dependencies were injected through that first screen’s constructor or the constructors of its dependencies.
Presenter pattern
Android Auto's UI is declarative. When you return a Template to be displayed, it contains both the widgets and their state. To update the display, you must throw out the old Template and return an entirely new one. This allows a UI test to effectively assert that the returned Template contains the widgets and state you expect.
To better leverage this testing strategy, we found it advantageous to create a separate Presenter class for each Screen to create its Template. The Screen would own that Presenter instance, pass in the necessary data, and return the output of that Presenter. This setup allowed us to test the Presenter in isolation, without having to worry about instantiating a Screen or its other dependencies.
Automated Testing
Beyond the Presenter testing described above, we also found it useful to test certain navigation events. This can be done by leveraging the testing classes provided by Google: https://developer.android.com/reference/androidx/car/app/testing/package-summary. The classes here provide fake implementations for various Auto-specific interfaces like ScreenManager and CarContext, allowing you to test any code within your implementation that’s less abstracted away from the Car APIs. Testing with these fakes is analogous to writing instrumented or robolectric tests against your Android code.
Location Permissions
Android 10 and 11 changed when apps are allowed access to a user's location. Before 10, apps were implicitly granted background location access along with the location permission. Then in 10, background location was added as a separate permission, but was still able to be granted at runtime from the system prompt. In Android 11, background location remains a separate permission, but is no longer able to be granted from the system prompt and requires the user to navigate to their device's settings screen to grant.
https://developer.android.com/about/versions/11/privacy/foreground-services
https://developer.android.com/training/location/permissions#background
This behavior affects Android Auto because the entire experience is driven by a service that your app owns. If you're not aware of this difference and happen to be testing with Android 10 or below, you may not realize you have an app breaking issue until it's too late!
There are a couple of ways to handle location access: request background location access, or make your CarAppService a foreground service. The former option introduces usability concerns because the user needs to be sent to their system settings to enable background location, so our recommendation is to make your service a foreground service. Using a foreground service means the user will see a persistent notification on their device while your Android Auto app is running, similar to how Google Maps behaves on Android Auto (you can see the option Google took with regards to this issue).
